Guides
How To Run Craft CMS On Amazon Lambda
Introduction
Craft CMS is a LAMP stack CMS. All traffic is routed through a single index.php file running at the web root of a server. This index.php file in turn knows where to go to find Craft and boot up all of its components. Those components in turn handle stuff like getting data out of the database, using templates to deliver HTML to web browsers, enforcing user rules and business logic, making outside API connections, &c.
When we run Craft on Lambda we're going to trick Craft into thinking that it is running on a server as it normally does. The Lambda function is going to use a Lambda layer called Bref which provides the PHP runtime necessary for the index.php file to be processed. That index.php file is in turn going to find Craft in a mounted EFS volume. That's basically going to be our server file system in the cloud. Craft will boot up and it will make a database connection to our RDS database which is again, a highly scalable database floating around in the cloud.
In theory this architecture can scale almost infinitely. Amazon does not have an infinite number of servers and your client does not have an infinite amount of money to give to Amazon, hence the 'almost' part. Still, by default 1000 concurrent Lambda instances can be running on a given account. The EFS file system can scale and expand to as large as the max size you sign up for. The RDS Aurora Serverless database can expand and burst and scale beyond what your client sites may ever need. All the while, you or your devops friends are making 0 updates to server software, applying 0 security patches, worrying 0% about unexpected traffic spikes, etc.
Should you run PHP on Lambda? Well, not if you want to obey the intent of the designers of Lambda. Lambda is for little stuff, little repetitive computational tasks that no normal self respecting server wants to bother with. But since we're web developers and we like to get dumb ideas in our heads for stuff to build we are going to run PHP in Lambda and Craft CMS along with it.
Overview
This guide takes you through the steps of setting up and running Craft CMS on Amazon Lambda. The following are the broad strokes of the steps necessary to set up the system.
- Set up security groups and such
- Set up Serverless services so that you can push code to Lambda
- Configure Bref on Serverless as your PHP runtime
- Spin up an EC2 instance as your helper
- Set up an instance of an RDS Aurora Serverless database
- Set up an instance of AWS EFS (Elastic File System)
- Set up an instance of Redis ElastiCache to handle Craft sessions and caching
- Install Craft CMS on your EC2 instance and make sure it works correctly with EFS and RDS
- Alter the index.php file running in Lambda to point to Craft sitting in your EFS instance.
- Test and tune
Step 1
Security Groups
Lambda security group
- Create a security group to control access for Lambda.
- Create an inbound rule for your Lambda security group to allow incoming HTTPS traffic from anywhere. Set Type as
HTTPSandAnywherefor Source.
EFS security group
- Create a security group to control access for your EFS volume.
- Create an inbound rule for EC2 to access your EFS security group. Set
NFSfor Type and set your EC2 security group for Source. - Create an inbound rule for Lambda to access your EFS security group. Set
NFSfor Type and set your Lambda security group for Source.
ElastiCache security group
- Create a security group to control access to your Redis ElastiCache instance.
- Create an inbound rule in the Redis security group for EC2. Set
Custom TCPtraffic to port6379. Set your EC2 security group for Source. - Create an inbound rule in the Redis security group for Lambda. Set
Custom TCPtraffic to port6379. Set your Lambda security group for Source.
RDS security group
- Create a security group to control access to your RDS database instance.
- Create an inbound rule for Lambda to access your RDS security group. Set
MYSQL/Aurorafor Type and set your Lambda security group for Source.
Step 2
Set up Serverless on your local machine You have to get your code up into AWS Lambda somehow. One of the most convenient ways is through the Serverless framework. This is the method recommended by Bref, the PHP Lambda layer we'll be using. Rely mainly on Bref for this: https://bref.sh/docs/installation.html
- Install Serverless with
npm install -g serverless - Create AWS access keys. Follow this guide.
- Save those keys for the next step.
Step 3
Update your local aws config to provide AWS access keys for the various projects you'll be working on.
- Open
~/.aws/credentialsin an editor. - Follow this guide to update the keys in that file.
- When ready to work on one of your projects, in your terminal, execute the command to tell Serverless which AWS profile to use for the project you're working on.
export AWS_PROFILE="profileName2"
Step 4
Initialize your project
Now that you have Serverless installed on your local machine and you have set up the credentials necessary for it to connect to your AWS account, you can initialize your project. The following steps come to us from https://bref.sh/docs/first-steps.html.
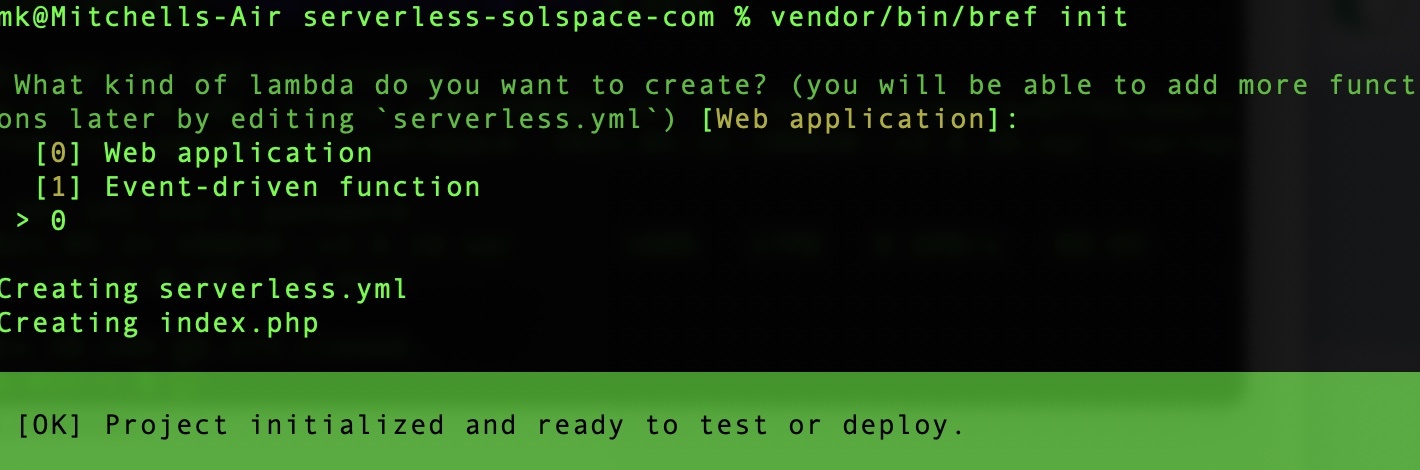
composer require bref/brefvendor/bin/bref init- At the prompt choose
[0] Web application - Make sure you get a success message like this:
Step 5
Try a test deployment. Run the main serverless deploy command to see if you can get the sample Bref deployment up on a Lambda function. Let's get some proof of life.
sls deploy
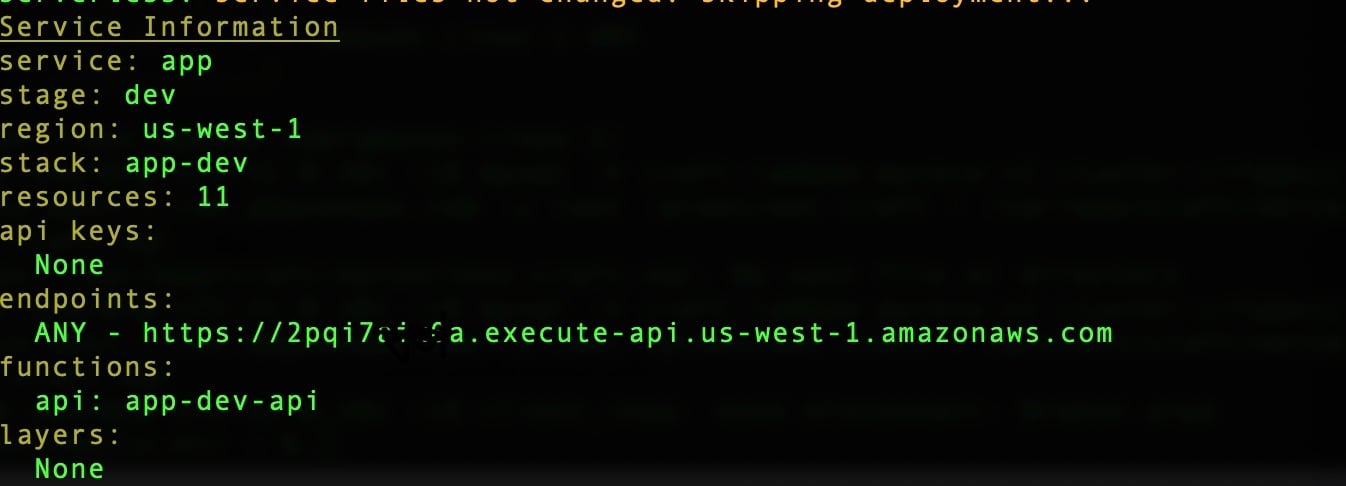
If you get a successful deployment you're Lambda function will be running. Serverless will provide you with the https endpoint you can hit in a browser to see the Lambda function fire. Something like this: https://9n50x1f26g.execute-api.us-east-1.amazonaws.com. Hit your url in a browser and you'll see Bref's welcome page.

Step 6
Find your Lambda function up in your AWS portal.
- Go to https://console.aws.amazon.com/lambda
- Look at the top right of your screen and figure out which availability zone (AZ) you are in by default.
- Your new Lambda function was likely deployed to AZ us-east-1 as the default that Bref sets. You can manipulate this by opening
serverless.ymlwhich is in the root of the project directory you're in on your machine. - Find provider: region: us-east-1. Change this to whatever AZ you're in by default. I'm in California so mine is us-west-1.
- Redeploy your Lambda function for the new AZ, if necessary:
sls deploy
Step 7
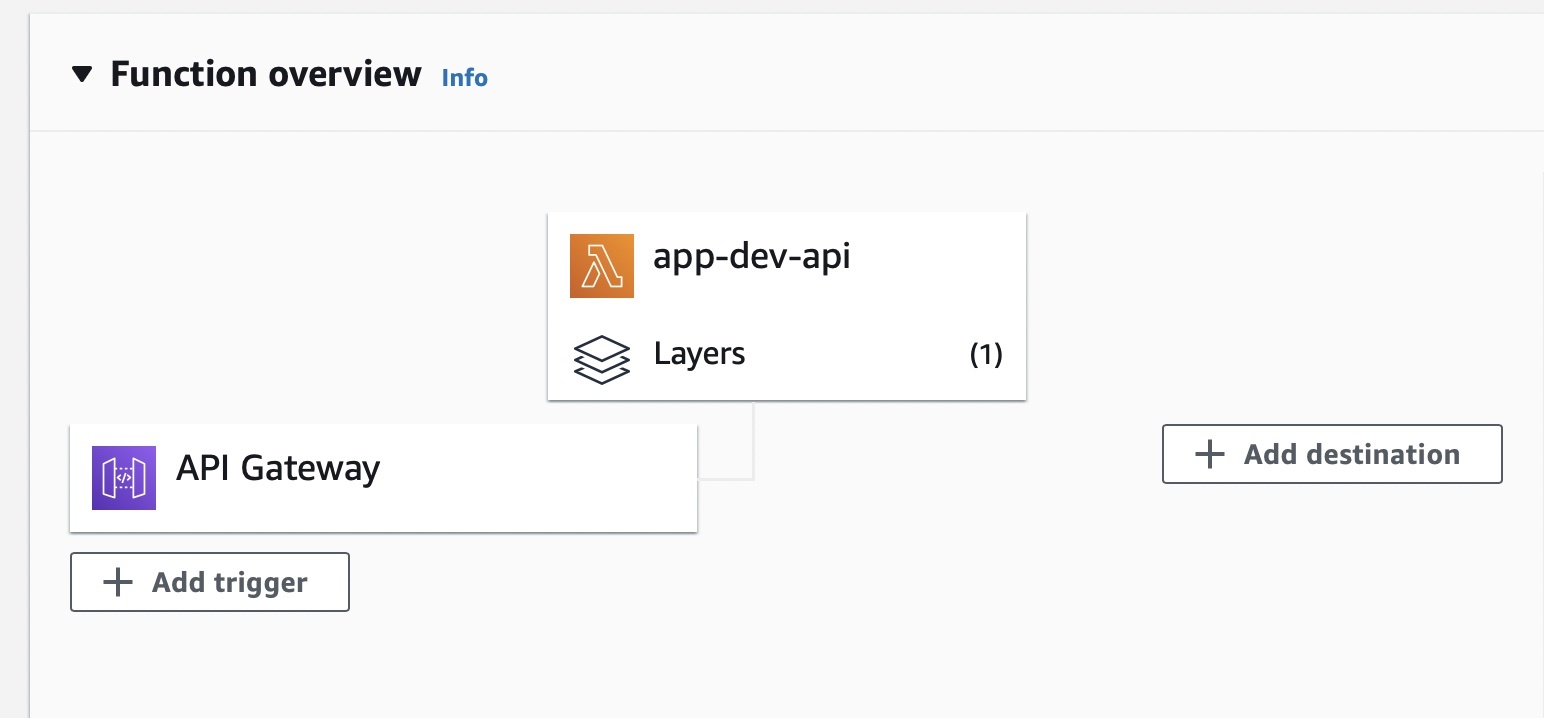
Review your Lambda function in the AWS portal. Click on the name of your new Lambda function. You'll see something like this:
- Click
Layerson your function and you will see php-74-fpm as the one layer your Lambda function is using. Lambda has the ability to pull in extra code and runtimes as layers, 5 max, that help you build your Lambda functions with greater complexity. - Click
API Gatewaythen clickDetailsand you can see the details of your Lambda function. You'll see the endpoint url and other metadata. - While you're in the Configuration tab of the API Gateway, have a look at VPC. In future steps you will need to join your Lambda function to one of your VPC's so that the Lambda function is allowed to access the EFS volume and RDS database you will set up. Remember where you saw this and remember it with dread.
Step 8
Update the Lambda IAM role to attach extra policies
- While looking at your Lambda function in AWS, click the
Configurationtab. - Click
Permissions - Under Execution Role click on the role that was setup by default by Serverless.
- Click
Attach policies - Find
AWSLambdaVPCAccessExecutionRoleand check the box. - Find
AmazonElasticFileSystemClientFullAccessand check the box. - Find
AmazonElastiCacheFullAccessand check the box. - Click
Attach policy
Step 9
Set Lambda permissions, VPC and security groups.
- Click the
Configurationtab. - Choose
VPC - Click
Editto attach your Lambda function to your VPC. - Choose the VPC you're using for this project, probably your default.
- Choose some subnets.
- Choose the security group you created specifically for Lambda. That group has the outbound rules to allow access to EFS and Redis.
- Click
Save
Step 10
Create an EFS volume
Craft is going to actually live in an EFS volume. It's a file system, like on your machine or on a normal server. This volume will be shared between your Lambda function and your EC2 helper instance. This way all that your Lambda function will contain is the Bref PHP layer and the main Craft CMS index.php file. We will manipulate that file so that it knows where to find Craft in your EFS volume.
- Go to https://console.aws.amazon.com/efs.
- Click
Create file system - Give it a name and assign it to your default VPC. Leave the Availability at Regional.
- Once the volume is available click the
Access pointstab. - Click
Create access pointand give it a sensible name. - Under Root directory path enter
/ - Under POSIX User ID enter
1000that corresponds to theec2-user - Under Group ID enter
1000 - Under Root directory creation permissions enter
1000for Owner User ID,1000for Owner Group ID and0777for POSIX permissions. - Click
Create access point
Step 11
Step access permissions on your EFS volume
- Find your EFS file system in the EFS
- Click the
Networktab - Click
Manage - For each of the availability zones, assign the security group you created for EFS. You can remove the default security groups.
- Click
Save
Step 12
Grab the command for mounting your EFS instance
- While looking at your new EFS instance, click
Attach - Copy the command you find under Using the EFS mount helper. Something like this
sudo mount -t efs -o tls fs-c900fed1:/ efs - Save this command for later.
Step 13
Set up an ElastiCache Redis instance. Craft on Lambda will need a place to store sessions.
- Go to https://console.aws.amazon.com/elasticache
- Click on
Redisin the left nav. - Click
Create - Give your Redis instance a suitable name and description.
- Under Node type choose
t2 > cache.t2.microsince this is not for production use. - Leave the other defaults in place.
- Make sure the VPC ID matches the VPC you have put the other services in.
- Choose subnets, assuming you have left Multiple Availability Zones on.
- Under Subnet group choose
Create newand give it a name and description. - Under Security click the pencil icon to edit the security group.
- Choose the security group you created for Redis ElastiCache.
- Click
Create
Step 14
Spin up an EC2 instance. This EC2 instance will be the tool that helps you install Craft on your EFS volume, troubleshoot DB connection issues and generally just be a good friend.
- Follow this guide.
Step 15
Mount the EFS volume from your EC2 instance.
- SSH to your EC2 instance.
- Create a directory that will serve as your mount directory for your EFS instance.
sudo mkdir /mnt/efs - Remember the command you copied above under the Attach panel of your EFS instance? Use that command inside your EC2 instance. Note that the end of the command will point at the mount directory you created on your EC2 instance, ie '/mnt/efs'.
sudo mount -t efs -o tls fs-123456:/ /mnt/efs
Step 16
Move Craft into your EFS instance. This will allow your Lambda function access to it.
sudo mkdir /mnt/efs/craftsudo chown ec2-user:ec2-user /mnt/efs/craftsudo mv -f /var/www/craft/{.,}* /mnt/efs/craft
You might find that this step is fussy. You may get some error messages about failing to move folders and such. Just keep in mind that the end result is to get the entire contents of your craft folder into your mounted volume. You may have to fidget with it a little. I certainly did.
Step 17
Update Craft on EC2 to point to the EFS instance.
- Open your index.php file. That's sitting in /var/www/html.
- Edit the CRAFT_BASE_PATH value. This now needs to point to the mount directory for your EFS instance.
- Something like:
define('CRAFT_BASE_PATH', '/mnt/efs/craft'); - Update your Craft config to serve the cpresources directory from EFS. This will help Lambda serve Craft in a future step.
- Open /mnt/efs/craft/config/general.php.
- Add this line to the existing config array:
'resourceBasePath' => '/mnt/efs/cpresources'
Step 18
Update Craft on EC2 to use the Redis instance you setup previously.
- Open /mnt/efs/craft/composer.json and add this line to the require block:
"yiisoft/yii2-redis": "~2.0.0"You can do this with nano while connected to your EC2 instance via SSH. cd /mnt/efs/craft- Run this command:
composer update - Open /mnt/efs/craft/config/app.php
- Change that file so that it looks like the following, note the redis hostname is your Redis instance endpoint:
use craft\helpers\App;

return [
    'id' => App::env('APP_ID') ?: 'CraftCMS',
    'modules' => [
        'my-module' => \modules\Module::class,
    ],
    'components' => [
        'redis' => [
            'class' => yii\redis\Connection::class,
            'hostname' => 'serverless-craft.bzndnwe.ng.0001.use1.cache.amazonaws.com',
            'port' => 6379,
            'database' => 0,
            //'password' => App::env('REDIS_PASSWORD'),
        ],
        'session' => [
            'class' => yii\redis\Session::class,
            'as session' => [
                'class' => craft\behaviors\SessionBehavior::class,
            ],
        ],
        'cache' => [
            'class' => yii\redis\Cache::class,
            'defaultDuration' => 86400,
            'keyPrefix' => App::env('APP_ID') ?: 'CraftCMS',
        ],
    ],
];
Step 19
Update serverless.yml to make Lambda more compatible with Craft. This part is really intricate. AWS is really fussy with how it allows services to connect to one another, especially concerning Lambda. Be careful and patient here.
- Open the composer.json file in your local Serverless project directory.
- Add this line in the required block:
"bref/extra-php-extensions": "^0.10.10" - Run
composer update - Open the serverless.yml file in your local Serverless project directory.
- Add this line in the plugins block under the ./vendor/bref/bref line:
- ./vendor/bref/extra-php-extensions - Add this line in the layers block of your function definition, replacing
us-east-1with the AZ your Lambda function is running in:- arn:aws:lambda:us-east-1:403367587399:layer:gd-php-74:14 - Go to https://console.aws.amazon.com/vpc
- Under Security find Security Groups.
- In the list of security groups, find the security group you created for your Lambda function. Grab that id. Something like:
sg-075c0a333e51ad0ba - Find your default VPC in AWS. Click on it to view its details.
- Click the route table listed under Main route table
- Click the
Subnet associationstab. - Grab the subnet ids listed and be ready to use them in your serverless.yml file.
- Under provider in your serverless.yml file, add the block below. Replace the security group id and subnet ids as appropriate from what you found in the steps above. Also note the addition of support for binary file types. This tells Lambda that it may permit .png, .woff, .ttf and other binary file formats. The Craft control panel needs this support and so may your front end code.
    apiGateway:
        binaryMediaTypes:
            - '*/*'
    environment:
        BREF_BINARY_RESPONSES: '1'
    vpc:
        securityGroupIds:
            - sg-075c0a333e51ad0ba
        subnetIds:
            - subnet-056919950b6436c87
            - subnet-0252c099d59a863fb
- Go to your EFS instance.
- Click on the
Access pointstab. - Click on the access point in the list.
- Find the Access point ARN. Something like:
arn:aws:elasticfilesystem:us-east-1:9422218975528:access-point/fsap-0120183391950ab01 - In your serverless.yml file after the layers block, add the following block to point Lambda at your EFS instance. Replace the ARN with what you found above.
        fileSystemConfig:
            localMountPath: /mnt/efsoops
            arn: arn:aws:elasticfilesystem:us-east-1:9422218975528:access-point/fsap-0120183391950ab01
Step 20
Grab the main index.php file from your EC2 instance running Craft. Replace the index.php file in your Serverless project directory with the index.php file from your EC2 instance.
- Add this block at the top of the file below <?php:
ini_set('display_errors', 1);
error_reporting(E_ALL);

$_SERVER['DOCUMENT_ROOT']   = '/var/task';
- Deploy your updated Lambda function:
sls deploy
Step 21
Adjust folder permissions
Once your updated Lambda function has deployed via Serverless you should be able to hit it in a browser. Remember the endpoint looks something like this:
https://b3rmrwssw9li.execute-api.us-west-1.amazonaws.com/
You will likely see folder permission errors that need to be corrected. While logged in to your EC2 instance via SSH, issue these commands:
sudo mkdir /mnt/efs/cpresourcessudo chown ec2-user:apache cpresourcessudo chmod -R 0777 /mnt/efs/craft/storage
Step 22
Test and tune
There is likely still much to be done with your new Lambda Craft site. But hopefully this guide got you up and running with a decent start.
Additional Notes
CP Resources
As noted by @mattgrayisok, Craft serves a lot of control panel assets. They all live in the cpresources directory. With Lambda you're dealing with an ephemeral thingy. It spins up, does what it's told and dies a peaceful death. Nothing is stored. So Craft cannot serve cpresources from a normal directory. Instead, when Craft doesn't find a cpresource where it expects, it streams through PHP to the browser. This is slow. Matt has a solution for this involving a custom plugin for Craft. But I instead found it easier to front my Lambda function with CloudFront. I then made a rule to cache all cpresources at the edge for like 24 hours. This makes the Craft CP on Lambda very fast.